In 3D Animation class, we have been learning how to create and texture models using various programs such as Maya, ZBrush, and Substance 3D Painter. One of our main ongoing assignments, is to create a character model based on a pre-existing design to learn the programs and process of 3D Animation.
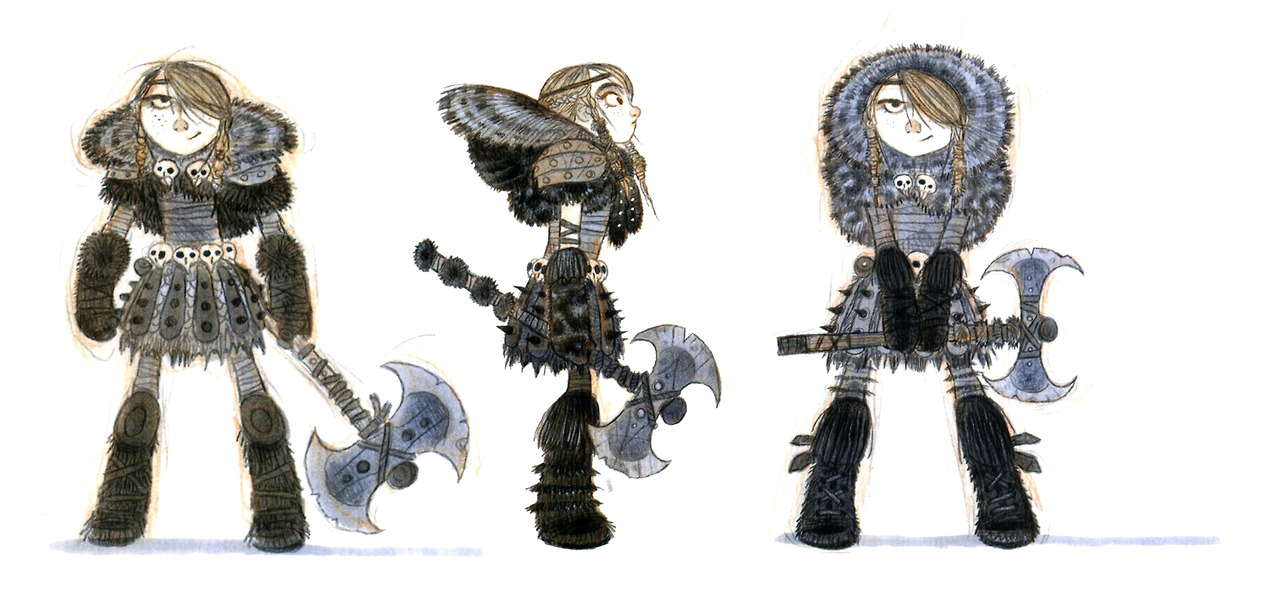
Our first step was to find a character model sheet of our choice. I referred to How to Train your Dragon’s concept art. My teacher emphasized we should find a very stylistic reference.
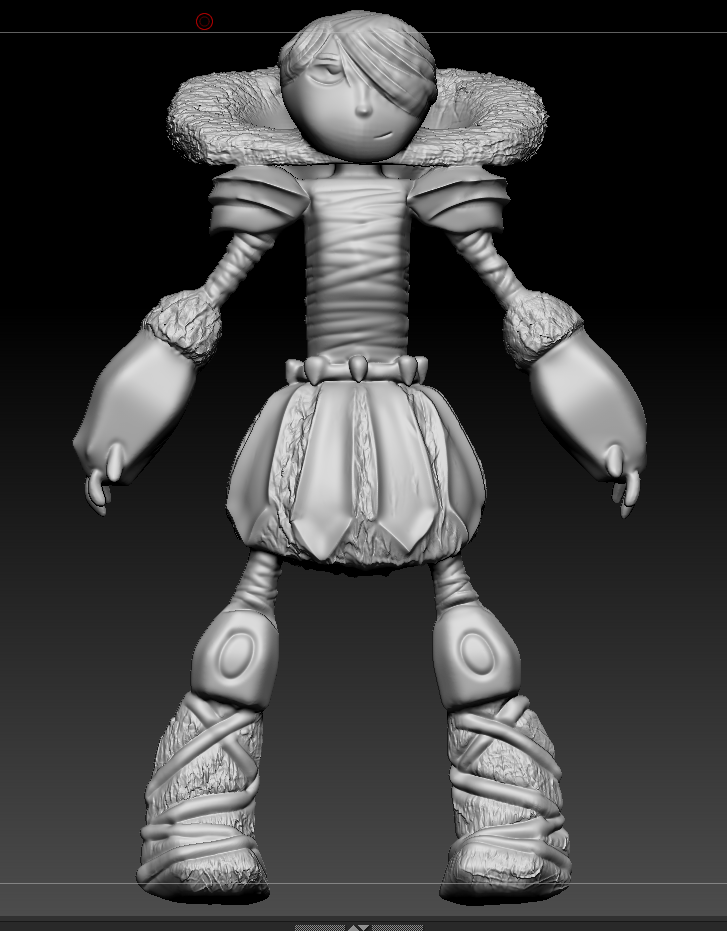
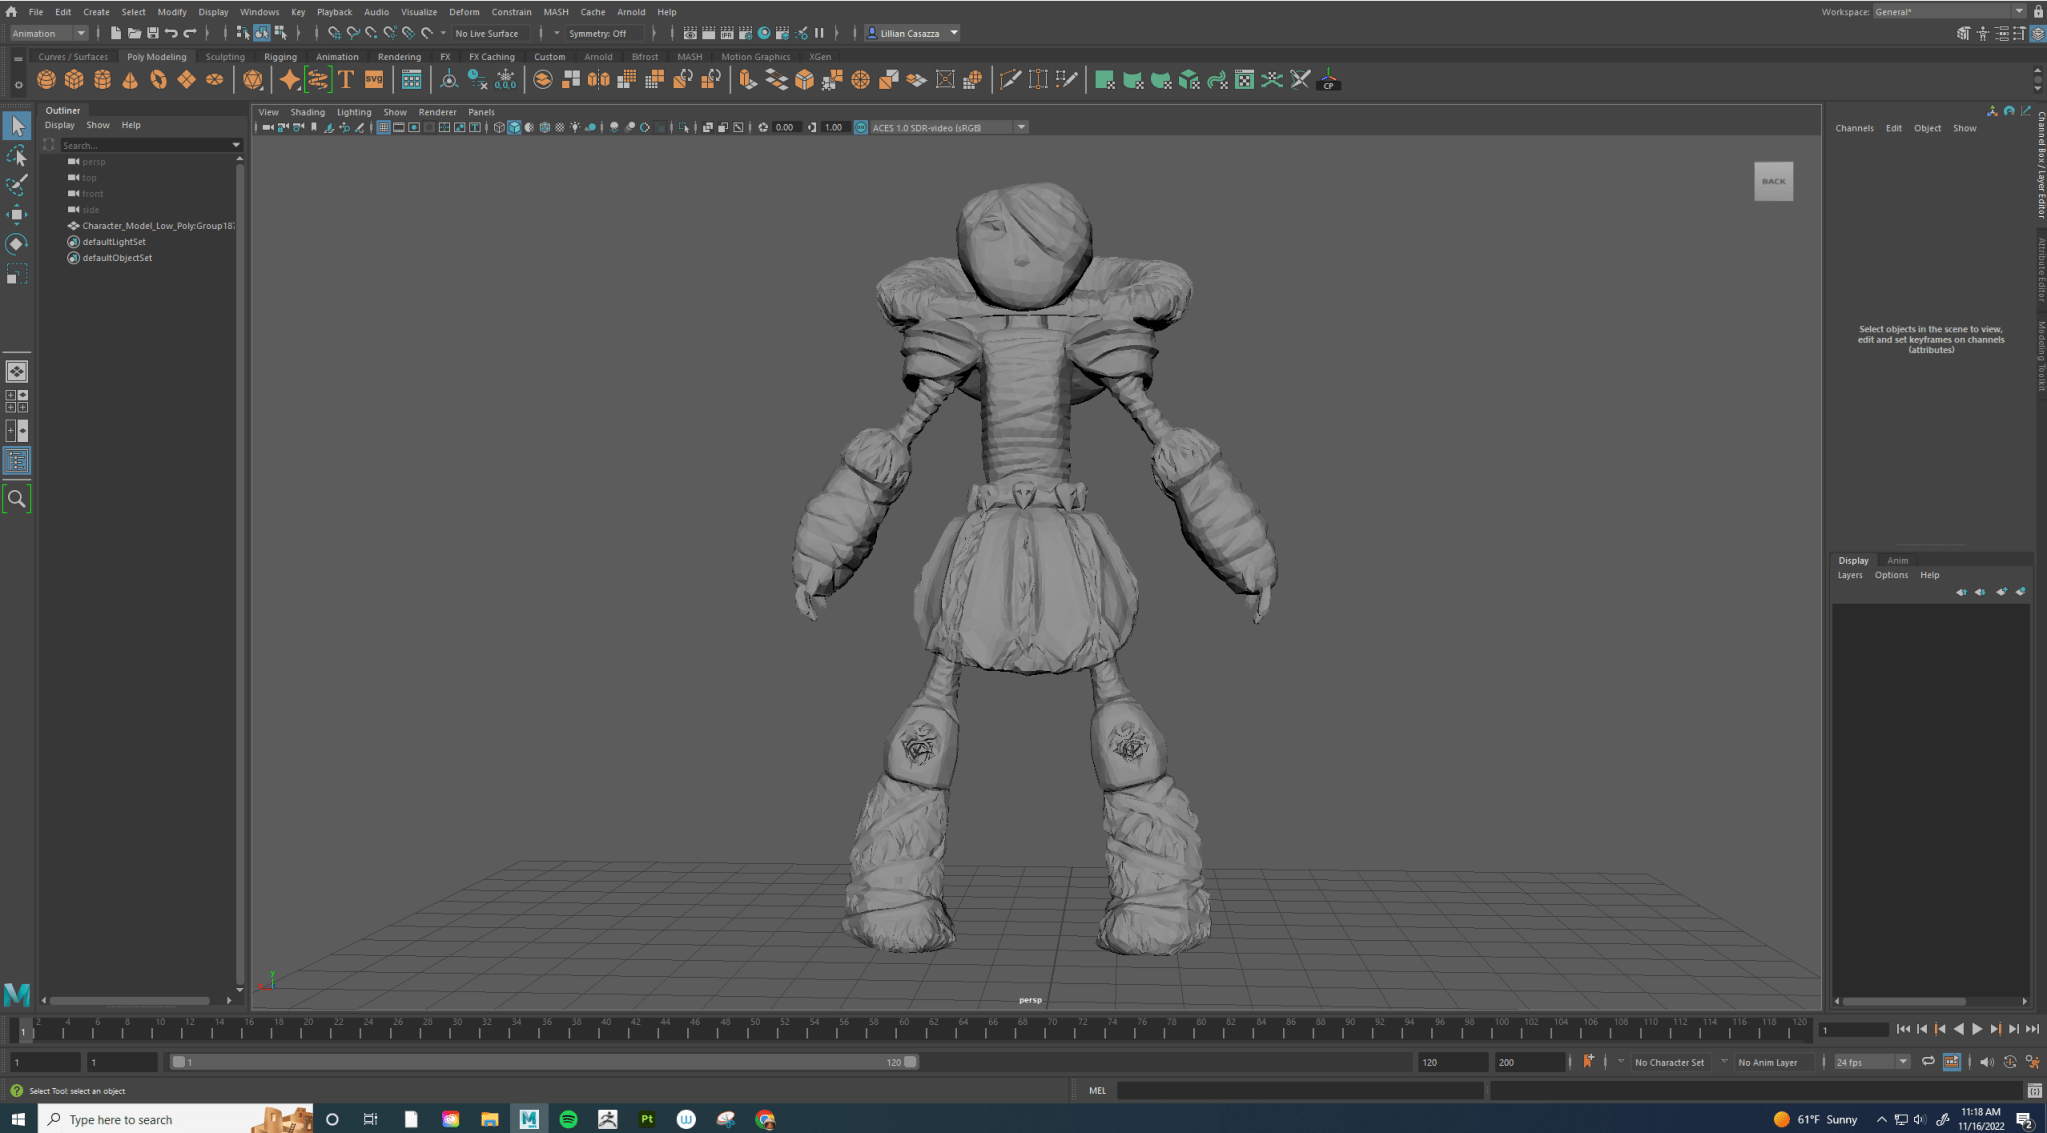
I imported the character model sheet into Autodesk Maya and created a general model based on the reference.

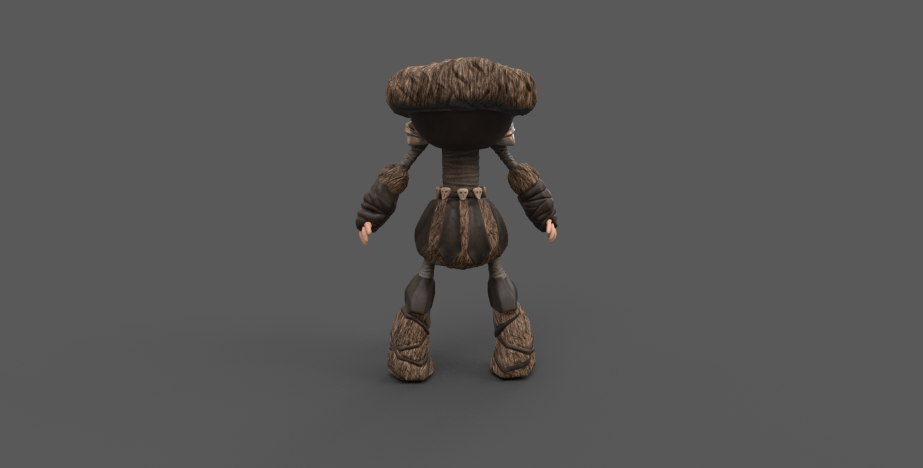
Next, I imported my model into ZBrush to finish the shape of the model with detailing. I started with the bottom most layer of my character’s outfit, the sarashi wrap. I used various tools such as clay buildup and dam standard to create a thick under layer. I moved onto the kilt, I created pointy pleats and tried to find a fur like texture, but ended up using one of the brushes that created a distorted random frizz look. I finish the character’s details as per the reference.
I decimated my model so that the polygon face count would be under a million for the high-poly model and decimated it even more so that the faces were under ten thousand for my low poly model.
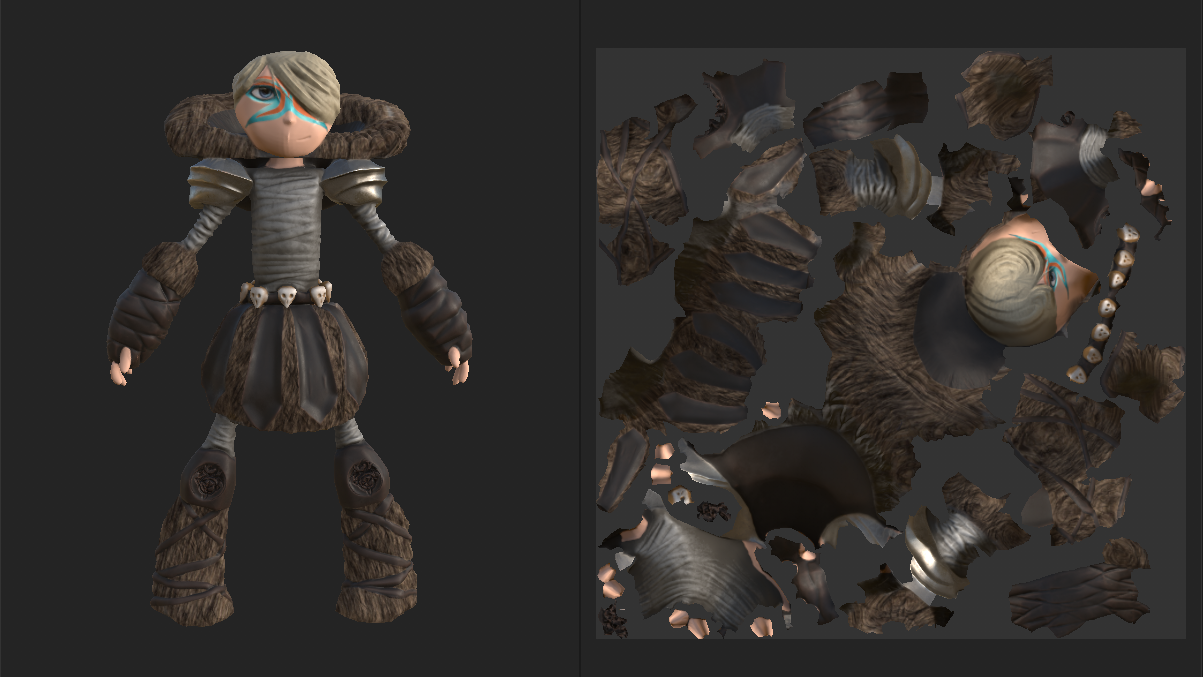
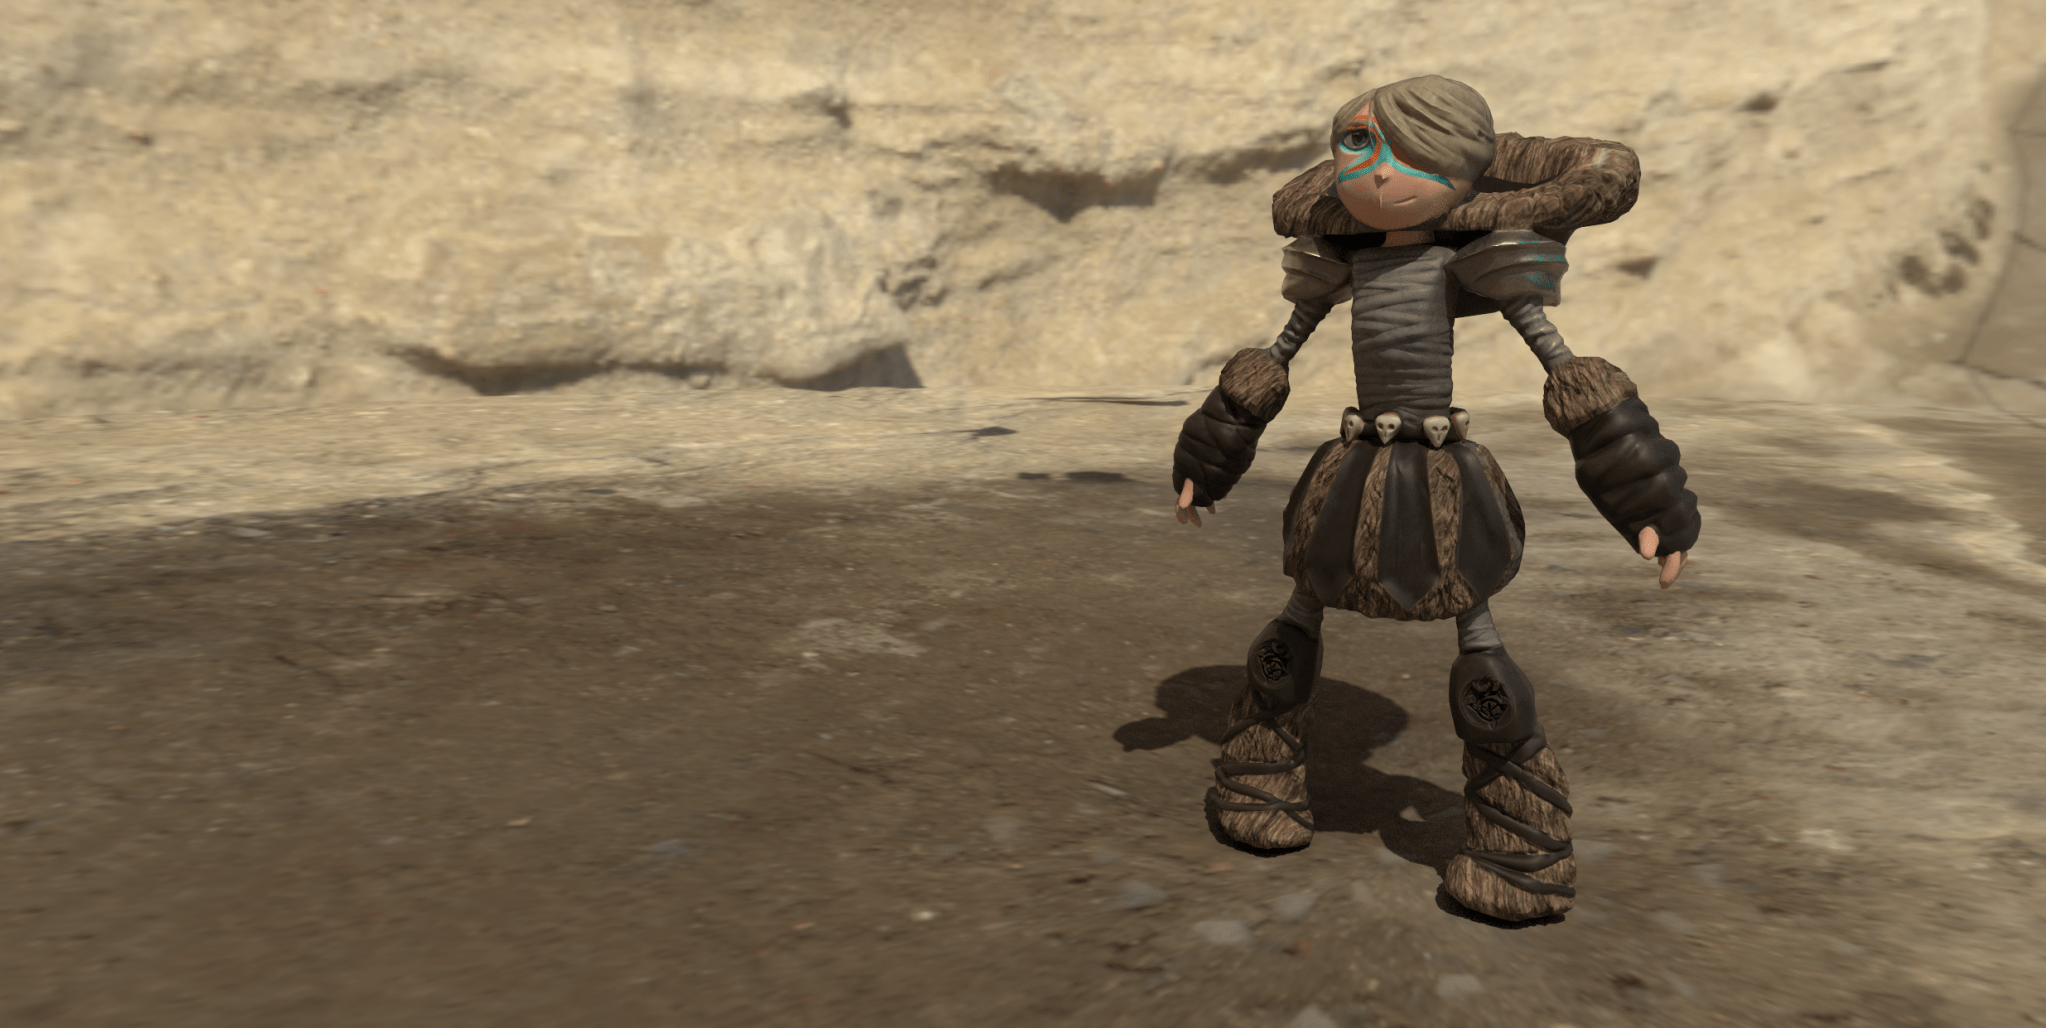
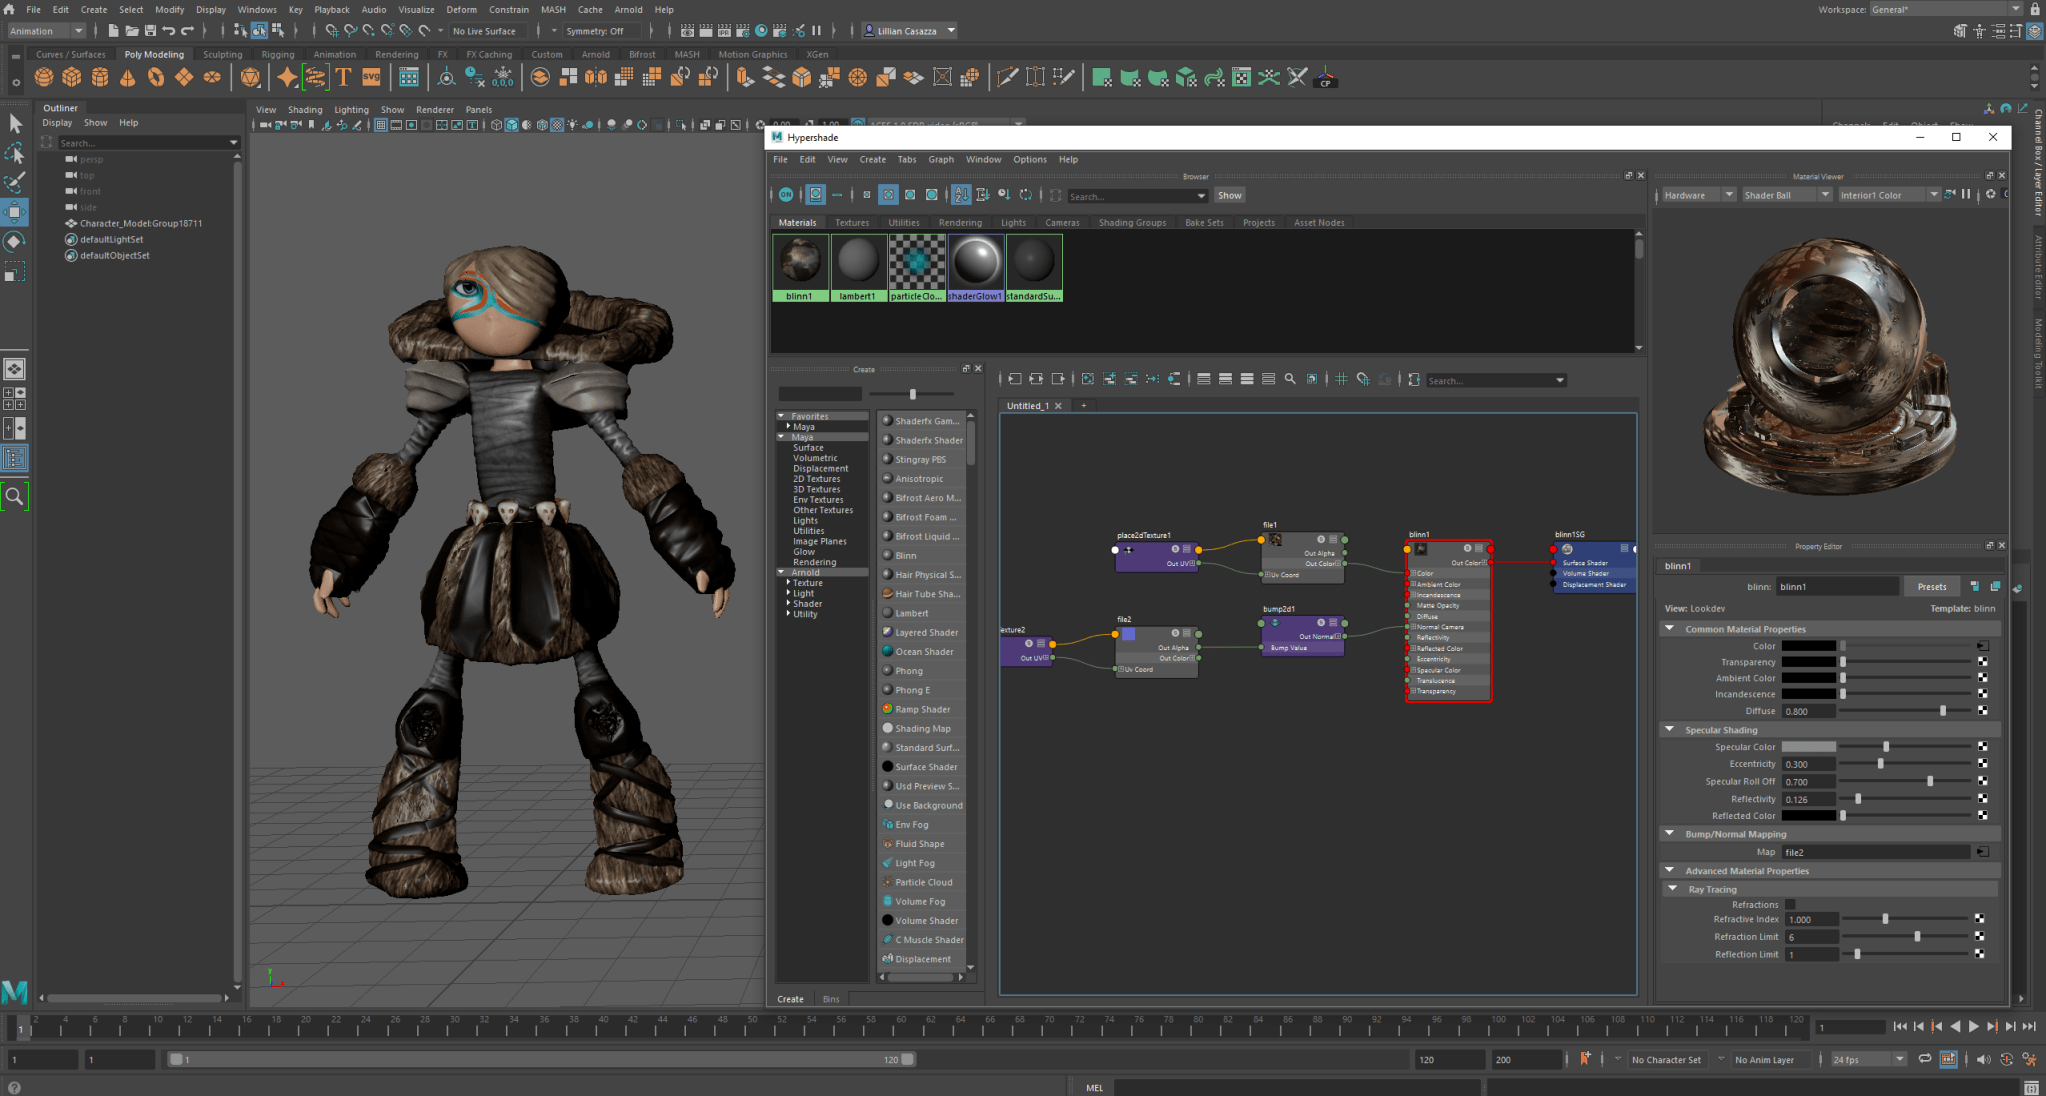
I imported my low-poly model into 3D Substance Painter for coloring and materials. After importing, I baked my high-poly model on top to add the detail back. I liked the color palette of the reference photo, but I wanted to add more contrast. So, I used dark leather, dark fur under the kilt, boots, and hood.
When I was adding the fur material, it looked unnatural, so I revisited my Zbrush model to fix the fur texture into an actual fur mapping, I also created the bird skulls and added a Norse decal on the knee pads.
Back on 3D Substance Painter, I mapped an image of an eye onto my character’s eye to give it more realism and pop. I wanted it to have a bit more color, and I was inspired by Sokka’s, from Avatar the Last Airbender, warrior face paint, so I took Astrid’s racing face paint and mapped that onto my character’s face.
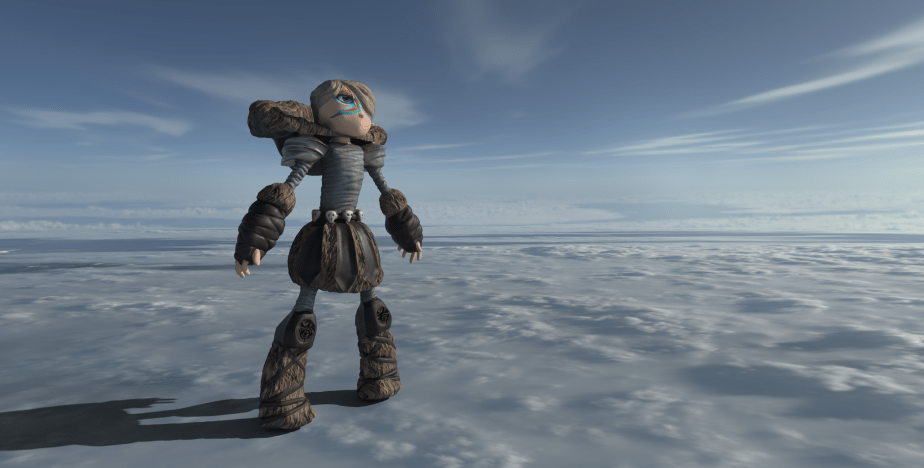
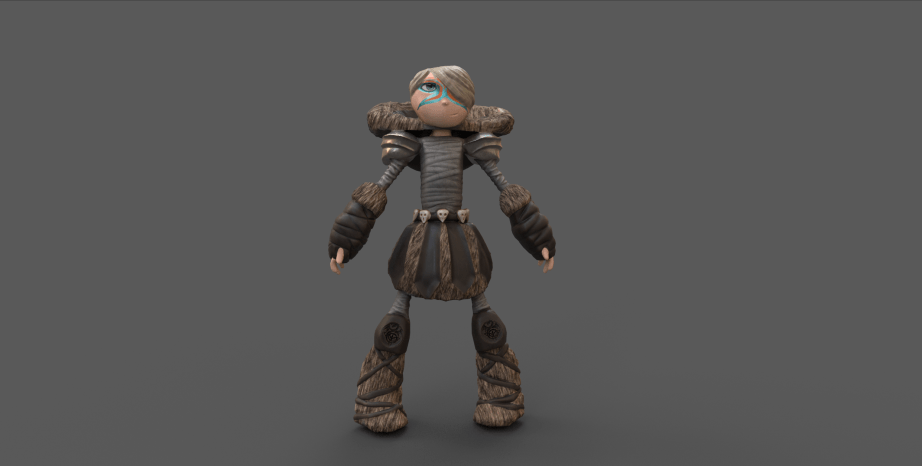
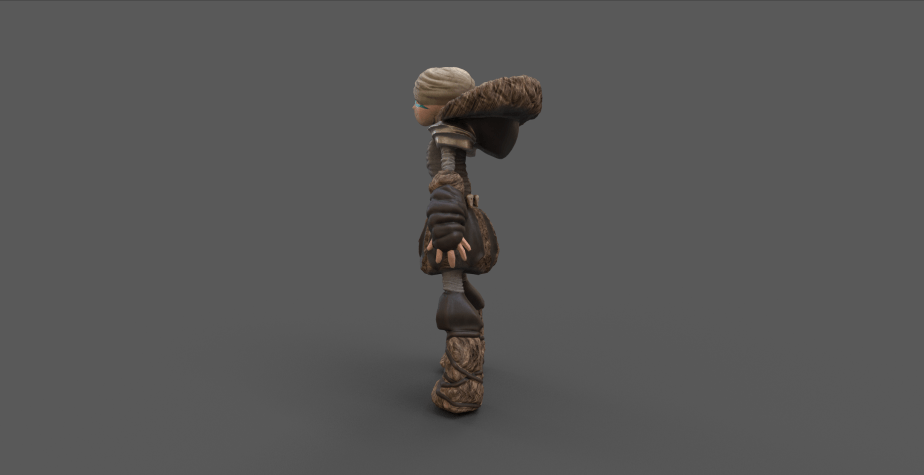
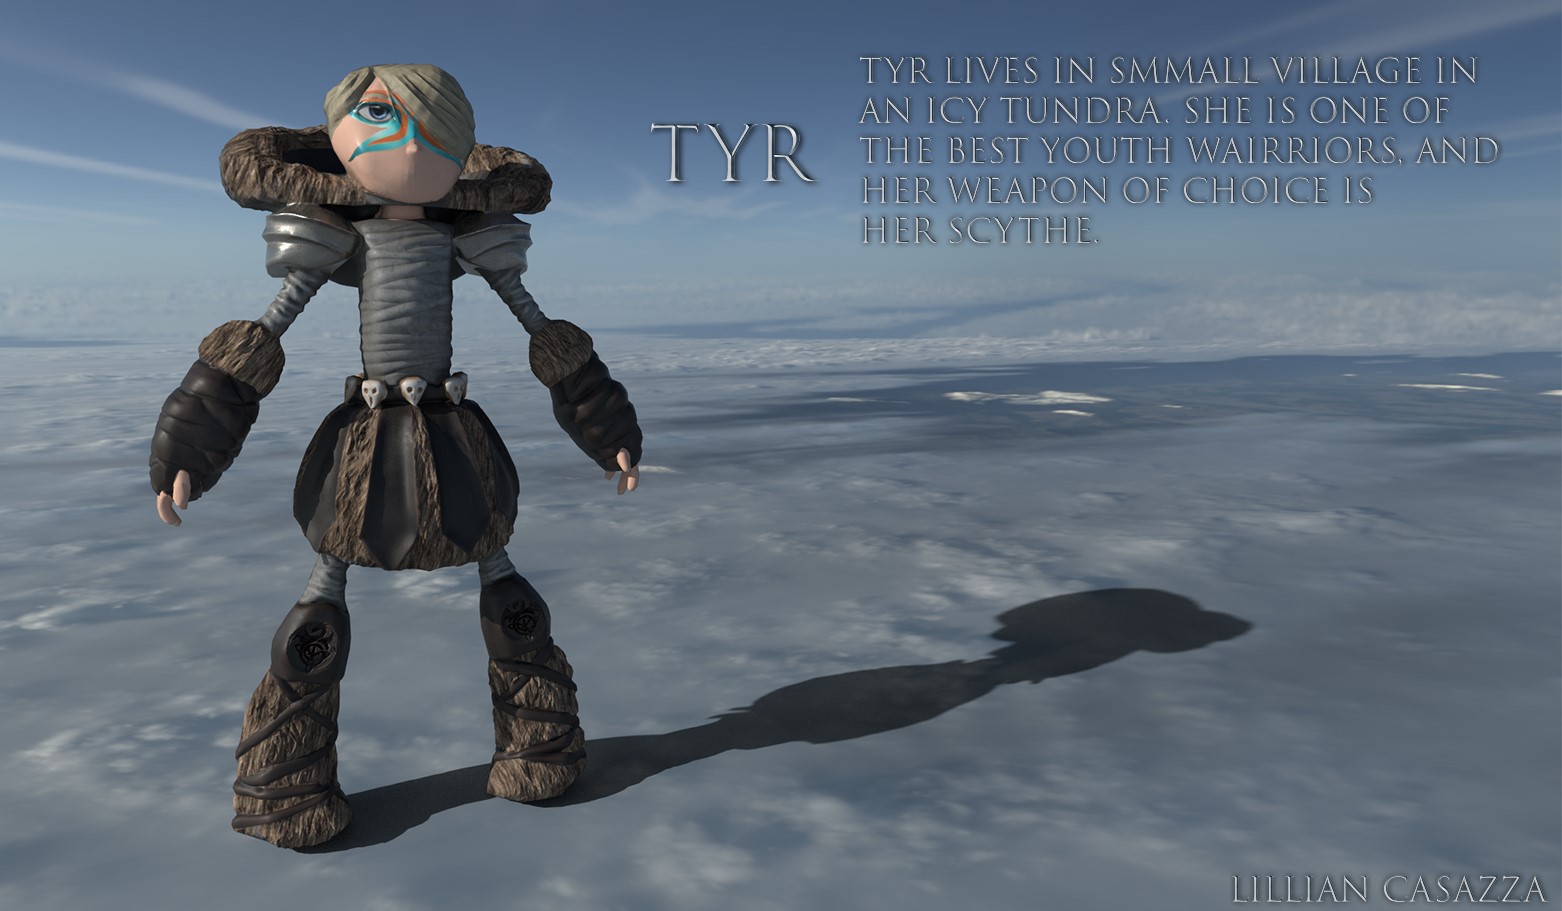
Afterwards, I created various rendering of my character to see what it would look like in a lighted environment.
I exported various mappings from 3D Substance Painter and then imported my low-poly model back into Maya.
Then I imported my normal GL mapping and color mapping onto my model so that it has all its color and detail.
Then I manually rigged my model by placing joints where it would be anatomically correct for my model.

We took a couple weeks to learn how to input and edit mocap data for our character model body animations. We also learned how to make facial expressions, and how to create lip sync animations.